Start Your Blue Lock Career Second Selection Walkthrough
Clear the 30-goal challenge, make smarter cell picks, and push toward Third Selection without panic restarts.
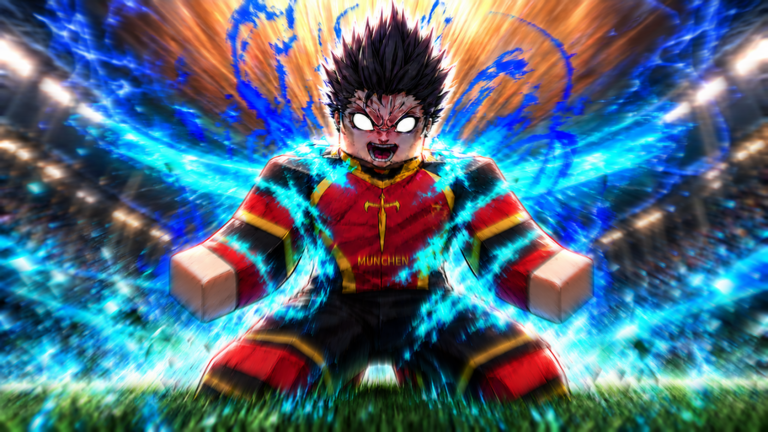
Second Selection is where many Start Your Blue Lock Career slots stall. The arc raises mechanical expectations after First Selection: volume finishing drills, sharper cell and rival choices, and high-pressure moments such as community-noted Rin 3v3 style confrontations. This page focuses on surviving that wall with a coherent build, enough Skill Points, and a calm plan for progressing into Third Selection — then eventually U-20 and the NEL World Cup climb.
For the full career map and restart philosophy, keep Career Mode open. For day-one redeem order, use Getting Started.
What Second Selection is testing
Second Selection is less about one cinematic highlight and more about consistency under ego pressure. The game asks whether your prospect can:
- Finish repeatedly when drills demand volume (the 30-goal challenge).
- Choose teammates / cell contexts that do not sabotage your Live habits.
- Hold identity when rival egos (including Rin-centered beats) compress space and tempo.
- Carry a Primary + Secondary + Flow plan that still works when decision modes and Live segments mix.
If you enter with Overall still near tutorial levels and a random kit, the arc feels unfair. It is usually under-prepared, not unbeatable.
Prep checklist before you open the arc
- Redeem codes on the main slot. SP-heavy strings from the Codes Hub must land where you play. Switch slots before Settings.
- Lock a “good enough” kit. Weapon-first frameworks on Builds beat waiting forever for World Class rarity (~3% community estimate).
- Assign a first SP tranche into attributes that support your Primary’s win condition (Stats & Overall).
- Know your modes. Live inputs (boost, tackle, aim notes) differ from 2D/3D decision prompts — skim Controls if you still mash the wrong context.
- Write a restart hypothesis only after you attempt the drills with a plan. Restarting before spending Lucky rolls wisely wastes the economy.
The 30-goal challenge drill
Community memory treats the 30-goal drill as the signature Second Selection wall. It punishes streaky finishing and kits without a clear shot or chance-creation pattern.
How to approach the volume
- Play your Primary’s pattern, not a highlight reel you saw in another Blue Lock game. If your weapon wants cutbacks, stop forcing pure pace dunks.
- Use Flow as stabilizer, not a panic button. A Flow that fights your weapons makes the 30-goal count feel longer than it is.
- Take breaks between attempts. Fatigue clicking the same failed angle teaches nothing; adjust SP or Secondary coverage, then return.
- Do not burn all Lucky rolls mid-drill. Bank gifts from codes, finish a focused block of standards if you must explore, and only open Lucky when you have a named target.
When the drill still feels impossible
Debug in order:
- Wrong slot received the SP codes.
- No coherent Primary / Secondary pair.
- Attributes ignore how you actually shoot or arrive in the box.
- You are in the wrong control mode for the prompt.
- Only then consider a career restart with a clearer build thesis (Career Mode).
Cell and rival picks
Second Selection layers cell and rival choices onto the mechanical tests. These narrative forks change who shares your space and how aggressive the ego clashes feel.
Cell pick tips
- Prefer partners that complement your finishing pattern (link play vs pure poaching) instead of stacking three identical chaos egos.
- If a cell fantasy looks cool but forces Live habits you have not practiced, skip it on a first clear.
- Remember that a “harder” cell can still be correct if it teaches the timing you need for later NEL Live segments.
Rival pick tips
- Rival pressure exists to force identity. Pick confrontations you can learn from, not only the ones that look easiest on paper.
- When a rival beat includes tight marking or tempo spikes, simplify your Live plan: one move to create space, one finish pattern.
- Track which rival choices closed branches you cared about — those notes become restart gold later.
Browse Players if you want character ego context before a major fork, but do not stall the arc reading lore for an hour.
Rin 3v3 and high-pressure matchlets
Players frequently call out Rin-centered 3v3 style moments as Second Selection stress tests. Exact scripting can shift with patches, but the skills transfer:
- Compact spaces punish greedy dribble spam; use boost timing with intent (Controls).
- A Secondary weapon that covers what your Primary lacks matters more in cramped 3v3 than in open tutorial lanes.
- Decision-mode prompts still appear — identify whether you are in Live freestyle or a timed choice before you commit.
Treat Rin 3v3 less as a boss with a single cheese and more as a midterm exam for your kit. If you fail repeatedly with the same animation into the same tackle, change the approach instead of restarting the whole career immediately.
Progressing toward Third Selection
Clearing Second Selection should leave you with:
- A kit you can describe in one sentence.
- SP spent on purpose, with EgoCoins banked for a possible reset.
- Notes on which cell / rival forks felt forced.
- Enough confidence to face Third Selection’s tighter identity questions.
Third Selection compresses the field again and foreshadows which NEL country fantasies will feel satisfying. Do not dump your entire Lucky stock the moment Second Selection ends — redeem any new patch codes first, then spend with a Third Selection / U-20 plan in mind.
Build frameworks that survive the wall
| Framework | When it helps Second Selection | Risk |
|---|---|---|
| Weapon-first | Best for new slots entering the 30-goal drill | Over-chasing World Class and delaying attempts |
| Flow-first | When weapons already work and you need identity under rival pressure | Stranding a great Flow on a mediocre kit |
| Balanced | After mixed code bags refill both economies | Ending mid-tier on both axes without a threshold |
Details and spend order live on Builds. Pair with How to Reroll so Lucky vs standard rules stay clear mid-arc.
Common mistakes
- Redeeming SP codes on an experiment slot, then wondering why the main career cannot finish.
- Restarting after one failed 30-goal attempt before adjusting SP or Secondary coverage.
- Copying arena tips from Blue Lock Rivals that ignore decision modes.
- Spending every Lucky Flow before weapons have a Primary you understand.
- Ignoring Updates after Major / hotfix waves that change drill feel or UI.
Related guides
- Career Mode — arc map and when restarts make sense
- NEL & World Cup — what you are clearing Second Selection to reach
- Builds — Primary, Secondary, Flow frameworks
- Codes — spins and Skill Points before the drill
- Getting Started — redeem and slot order
- Controls — Live vs decision inputs
- Stats & Overall — SP that actually moves finishing
Second Selection rewards preparation. Claim codes on the right slot, bring a kit with a sentence-long plan, clear the 30-goal volume with patience, and walk into Third Selection with notes instead of tilt.
Frequently Asked Questions
Quick answers to the most common questions.
What is the 30-goal challenge in Second Selection?
A high-volume finishing drill the community treats as the main Second Selection wall. Bring a coherent weapon and Flow pair plus enough Skill Points before you blame the mode alone.
Should I restart if I fail the drill once?
No. Adjust Skill Points, Secondary coverage, or Live approach first. Restart only with a written build or decision-tree hypothesis.
Do cell and rival picks matter?
Yes. They change partner fantasy and ego pressure. Prefer picks that match the Live habits you can already execute.
How do I prepare for Rin 3v3 style moments?
Simplify your plan in compact space, know whether you are in Live or decision mode, and make sure Secondary weapons cover what your Primary lacks.
What should I do after clearing Second Selection?
Bank notes on forced forks, redeem any new codes, keep Lucky rolls for Third Selection / U-20 goals, then continue the arc toward NEL and the World Cup.